Mountain sector · Laurentides · ·
Le Centennial Ridge Route
The Centennial is the only route in the Laurentides that spends more than two hours genuinely above the treeline, and it earns that distinction. Four separate ridge crests, three of them wind-scoured to bare rock in a normal winter, and a final 200 m push that is consistently the hardest snowshoe travel in the range. It is not a beginner route and it is not a route you do alone on a first attempt.
Arrival
From Route 117 take Chemin du Lac-Supérieur north for 11 km; the road is plowed and sanded to the P3 turn, then narrows to one lane for the final 400 m. Check the park gate board before you leave the car — if the wind chill line is below -25 C, the ridge section should be treated as a turnaround point, not a through-route. Snowshoes go on at the trailhead board, not at the first steep pitch: the first 1.2 km is an old carriage road that carries enough loose snow to make boots pointless.
The line
0.0-1.2 km · Carriage road to the first crest
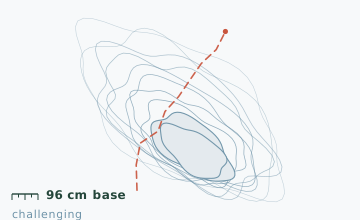
Wide, gently climbing, and deceptively easy. Stay on the track that bends left at the second culvert; the right-hand branch is a private lease that dead-ends in a sugarbush. Snow depth here measured 96 cm at the base stake on 4 February.
1.2-4.8 km · The four crests
The route now follows the ridge north-east, crossing four tops between 780 m and 875 m. Between crest two and three there is a 250 m section with a 30-degree side slope on the left — this is the only place where a careless step puts you sliding into the spruce. Snow on the crests is wind-packed to 20-40 cm; the lee side of each crest holds the deeper, softer snow.
4.8-8.2 km · Descent into the col
A long, straight drop of about 180 m into a saddle where two drainages meet. The col is 3-5 degrees colder than the ridge and is the usual lunch spot. From the col the route turns south-west and re-enters continuous forest.
8.2-9.6 km · Return on the lower loop
The lower loop closes back on the carriage road. It is flatter but crosses three small streams that stay open until late February — expect to step over, not through.
Travelling the line, step by step
- Read the gate bulletin and set a turnaround timeCheck the wind chill and avalanche bulletin at the P3 board, then write your turnaround time next to your name on the sign-in sheet. A 13:00 turnaround still leaves daylight for the descent.
- Fit snowshoes at the trailhead board, not laterThe carriage road carries 60-70 cm of loose snow by late January. Adjust bindings so your heel drops fully, then walk 50 m and re-tighten both.
- Cross the crest two to three traverse one at a timeUnclip your poles from their wrist straps, watch your partner from a safe point beyond the slope, and keep 20 m of spacing so you never put two people on the slab at once.
- Eat and drink at the col, not on the crestsThe col is sheltered and 3-5 C warmer. Stopping on a crest for more than five minutes is how hands get cold enough to slow down the rest of the day.
- Take the lower loop out and treat every crossing as openPoke each stream crossing with a pole before you weight it, even in March. The lower loop is 1.4 km longer than the direct descent but avoids the last steep pitch when you are tired.
What to carry
- Snowshoes with 8-inch (20 cm) flotation and steel crampons - the ridge crests are rock-hard
- Collapsible poles with winter baskets, both of them, not one
- Ski goggles, not sunglasses - spindrift on crest three is constant
- Hard-shell insulated bottle (a soft bottle freezes solid in about 90 minutes here)
- Foam sit pad and a belay jacket for the col
- Map and compass plus a GPS track; phone batteries die fast at -20 C
- Headlamp with a spare set of batteries
- Repair kit: two spare binding straps and a length of duct tape
- First aid with a SAM splint and a compression bandage, not just adhesive strips
What can go wrong
- AvalancheCrest two to three traverse: a 30-degree side slope that has run naturally after every storm over 20 cm. Cross one at a time.
- IceThe col stream crossing freezes as a thin shell over running water well into January.
- Open waterThree open crossings on the lower loop; all three hold until late February in an average winter.
Turn around at crest three if the wind is strong enough that you cannot hear your partner at arm's length - that is the standard used by the park's own winter patrols. There is no cell coverage past the 4.8 km mark. Tell someone your expected return time and the exact route, and leave a note on the dashboard with the same information; the park checks dashboards at the P3 gate after dark.
Before you go
- Do I need avalanche training for this route?
- For the ridge crests, no - they are wind-scoured and the exposure is short. For the crest two to three traverse you should have at least read an avalanche bulletin that morning and be able to recognise a wind slab. The park posts a bulletin at the P3 gate from mid-December.
- How long does it actually take?
- Five hours is what a fit party moving steadily takes. Groups of four or more routinely take six to seven, mostly because of the traverse bottleneck and the col stop.
- Can it be done in boots with microspikes?
- Only for the first 1.2 km. Past that the snow is knee-deep in the forest sections and the crests are too steep for spikes alone in anything but the hardest spring crust.
Nearby and similar
- Mont Condor Lookout Route · Laurentides · 6.2 km · Moderate
- Frost Hollow Traverse · Laurentides · 7.8 km · Moderate
- P'tit Train du Nord Northbound Corridor · Laurentides · 12.4 km · Easy
The figures above are our own measurements from the date shown. Only the conditions on your day count: check the current forecast, the gate bulletin and the snowpack before you set out, and treat every ice crossing as open until you have tested it.